The SAP Business Network user interface is getting a refresh to align with SAP’s vision of an interconnected, digital-first ecosystem that drives agility and operational excellence. While there is a new layout, the functionality of your account remains the same. See the information and videos below for a quick tour! (Captions available in English, Spanish, Portuguese, French, and German via video Settings menu)
|
Homepage
You will see the home Dashboard in your SAP Business Network account has a sleek, new look.
Check out this video to see how you can navigate the dashboard, and try it out for yourself!
- You will notice that many of the tabs and functionality have remained the same. You can still switch to other SAP Business Network applications such as Proposals and Questionnaires and Contract Management.
- While the Create button in the upper right corner has a new look, you can still choose the same options based on your customers transaction rules.
- The new Setup Actions section will take you directly to different settings configurations such as Order routing preferences, Payment preferences, Add new users and roles, and more!
|
|
|
How to Find a Purchase Order
The new SAP Business Network layout allows you to search for purchase orders in a similar way, with some added filters and adjustments.
Watch this video for a demonstration!
- You can search for purchase orders by clicking one of the Orders tabs in your overview, by going to the Workbench, or by searching in the search bar right on your home dashboard.
- Be sure to check out the new search filters!
- The Creation Date format has updated. You can set a date range from the drop down, or select from suggested time frames such as last week, last month, etc.
- Make sure you click Go when you have your new filters set and are ready to search!
|
|
|
Purchase Order Layout
Watch this video for a demonstration of the reimagined Purchase Order layout!
- On the top right side of the Purchase Order, you will see a Create button with a drop-down arrow. This is where you will see the options for creating Order Confirmation, Ship Notice, and Invoice.
- New tabs across the top of the Purchase Order jump to different sections on PO:
- Details: view information such as General PO details, Related Documents, Shipping, Billing, and Contacts
- Line items: view line items of the PO
- Tax: view tax information on PO
- Additional Amounts: view allowances and additional charges on PO
- Summary: view the summary of charges on the PO, such as subtotal, tax, allowances, shipping, etc.
- Comments: any comments added to PO by your customer
- Attachments: view attachments on the PO added by your customer
- Order History: View dated status updates regarding your PO
|
|
|
Order Confirmation
Creating an Order Confirmation remains very similar.
Take a look at this video for a refresher!
- As mentioned in the Purchase Order layout video, you will click the new Create button and select Order Confirmation to begin.
- You will still see the options to Confirm entire order, Reject entire order, or Confirm with information update in line.
- Just like with the Purchase order, there are tabs at the top of the New Order Confirmation screen that allow you to jump to different sections.
- IMPORTANT: When you click Create, you will not have the option to review the Order Confirmation again before submitting. Be sure to review your document and when you are ready to submit, click Create.
|
|
|
Ship Notice
Creating ship notices just got a lot faster. Check out this video for a quick tutorial!
- The new items at the top of the Ship Notice show items required by your customer, and items that you can choose to include or not to include, such as Tracking Details.
- By clicking Preview, you will have the chance to review the Ship Notice again before officially submitting.
|
|
|
Invoice
Invoices have an updated look to match the new Purchase Order layout! Take a look at some of the changes below.
- You will notice the new tabs across the top allowing you to easily navigate to different sections of your invoice.
- Just as before, some Invoice fields may be greyed out if your customer does not allow you to edit these fields. You can check these permissions in the Transaction Rules section of your account.
- The new Tax Rules section allows you to choose if you will add tax at the header level or the line item level.
- In the Tax section, be sure to click Add Tax Item to begin adding your tax details.
- If any items require attention before you submit the invoice, you will see the alert in the lower left corner. Click on the orange triangle to view what should be addresses before submitting.
- By clicking Next you will then have the option to review before submitting the invoice. If you need to make changes before submitting, click Edit in the top right to be taken to the previous screen. If you are ready to submit, click Submit in the lower right corner.
|
|
In addition to Transaction Document changes, you will also notice updates to other pages in your account.
|
New Settings Page
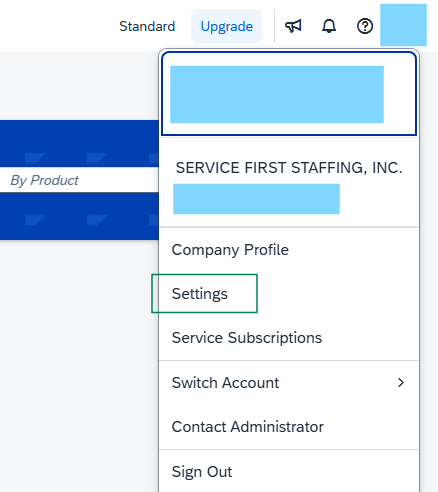
When you navigate to Settings within your account, you will see a new page rather than a new menu.
- Click [User Initials] > Settings to see the full page of account settings. You will find this easier to navigate than the previous menu.
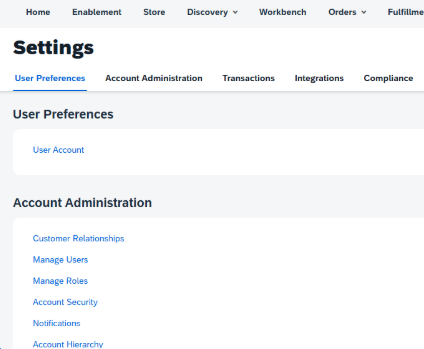
- The tabs at the top of the page will allow you to scroll to different sections on the Settings page.
- Check out the Settings selections on your own time! Many of the options have remained the same, a few of the updated options are highlighted below.
|
 → → 
|
|
Supplier Information Portal
You can now access your Customer's Supplier Information Portal directly from the updated Customer Relationships page!
Follow the below steps and give it a try:
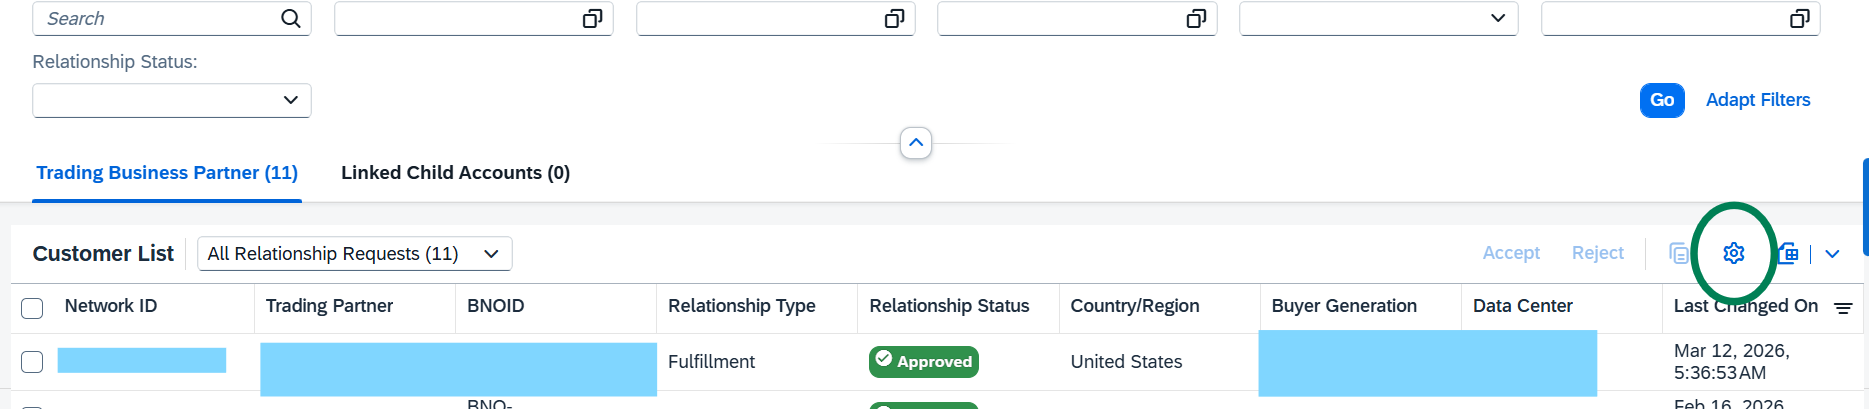
- Click [User Initials] > Settings > Customer Relationships.
- Click the gear icon shown in the first image to adjust the settings of your Customer Relationships page.
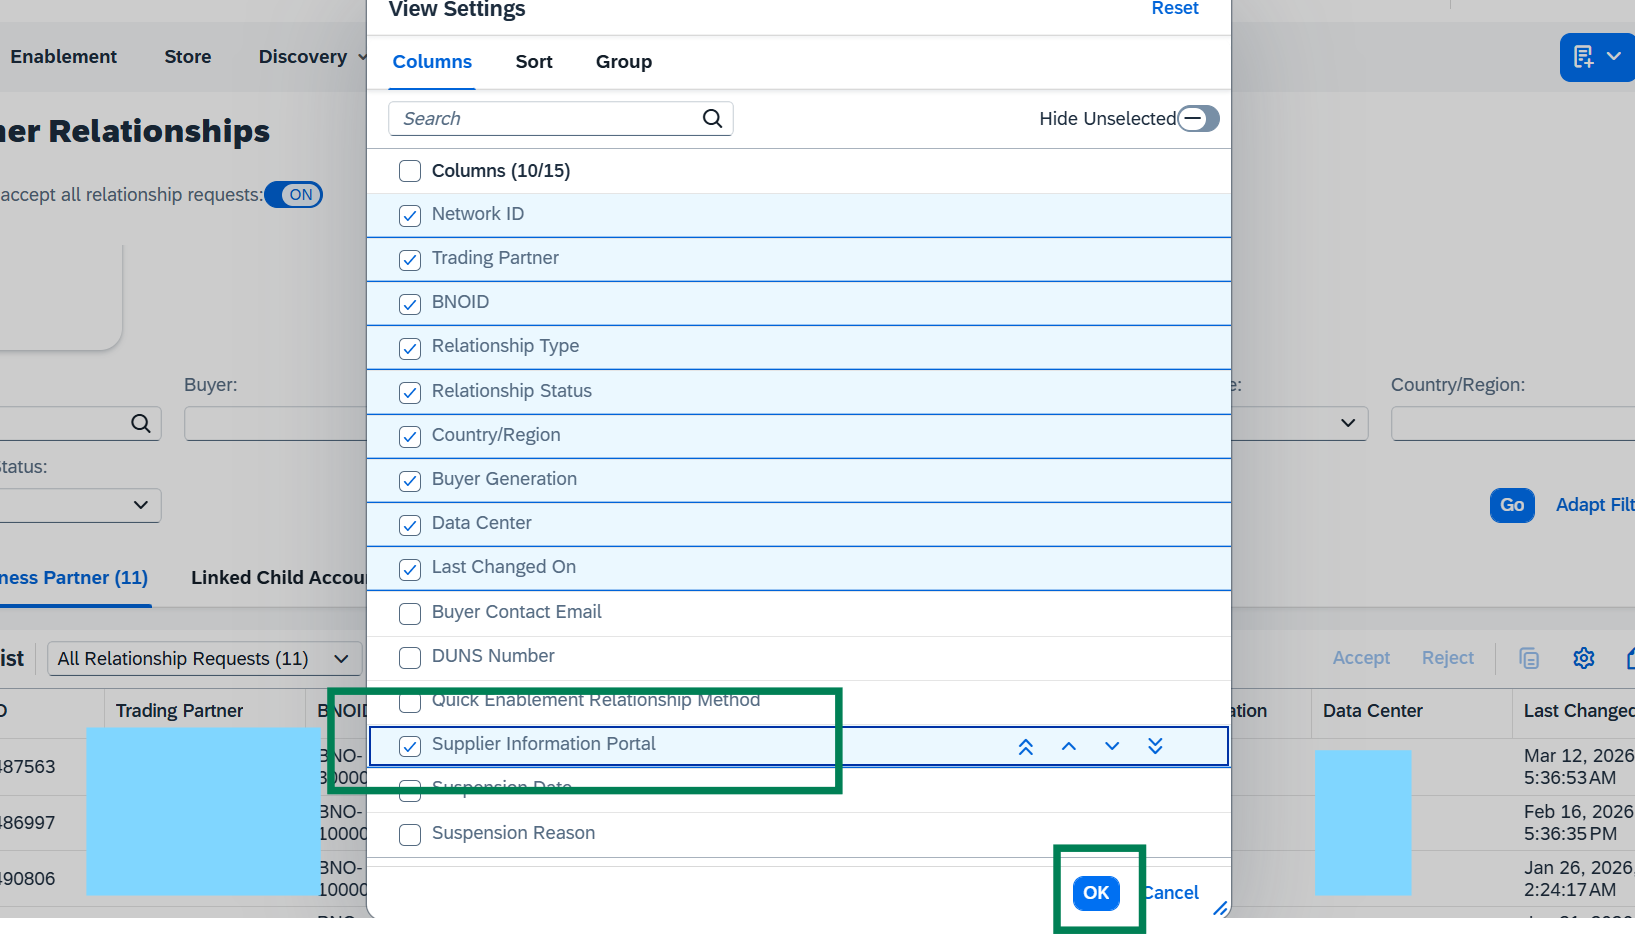
- Check the box next to Supplier Information Portal then click OK.
- You will now see the Supplier Information Portal listed for each customer.
|
↓
|
|
Add Roles / Add Users
To add a new sub-user to your account, you will click on Manage Users under the Account Administration section on the Settings page. The page has a new look, but the steps remain the same.
- If you are adding a sub-user for the first time, be sure to add a role for the user first by clicking Manage Roles. You must first create a role with permissions for the user to be assigned.
- You can now give sub users the User Administration Permission. This allows sub users to create new users and roles, and edit existing users.
Check out the second video highlighting new permissions and best practices!
|
|
|
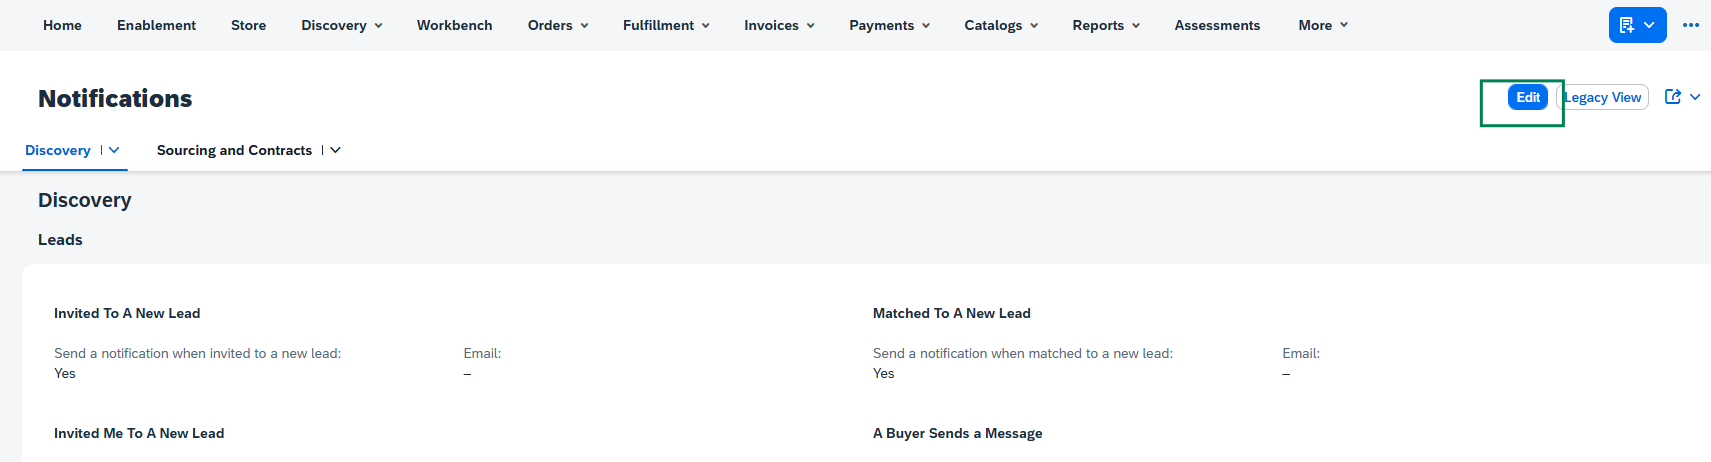
Notifications Updates
When on the Settings page, you will see two options to update your Notification preferences.
- For Discovery and Sourcing Notifications, click Settings > User Notifications & Preferences.
- Click Edit to see the email and check boxes appear. You can enter up to 3 emails separated by a comma.
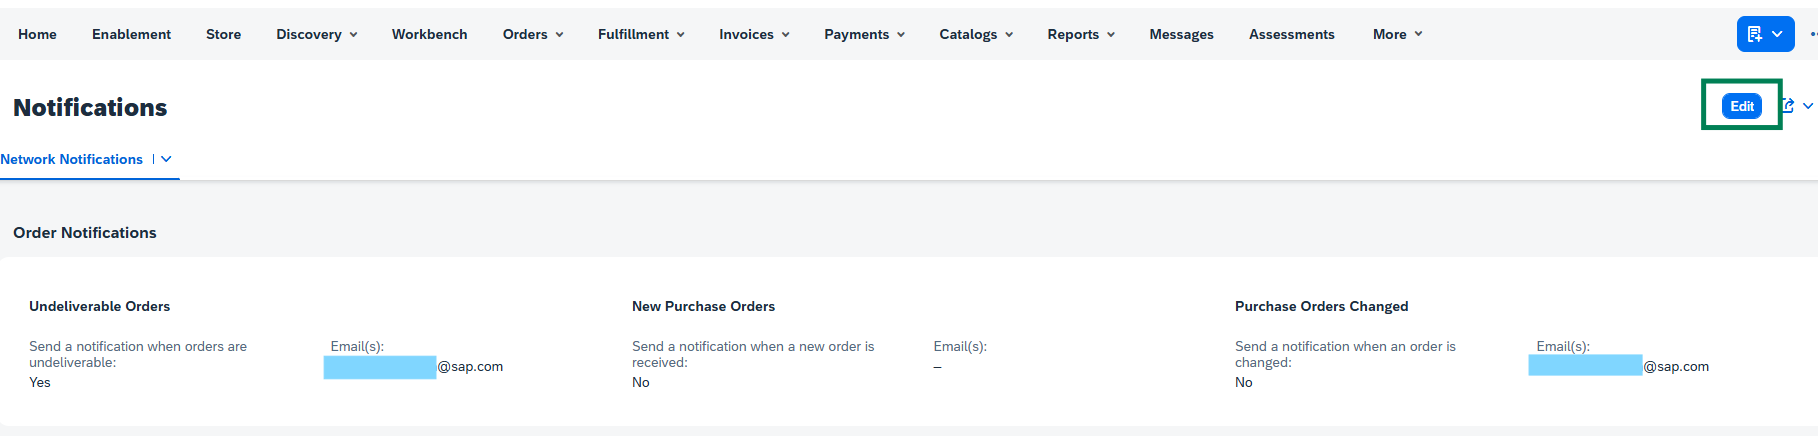
- For General Network Settings, Click Settings > Notifications.
- Click the drop down arrow next to Network Notifications to jump to different sections of the Notifications page.
- Enter up to 3 emails separated by a comma
- Be sure to click the Edit button in the upper right corner before making any changes! Then click Save.
|
Discovery & Sourcing Notifications
General Network Settings
|
|
Order Routing
Check out this video to see the updated process for setting document routing preferences in your SAP Business Network account!
|
|
We encourage you to explore the new SAP Business Network layout for yourself. Let us know what you think!
Translated Videos available below:
Additional Helpful resources:
Supplier Readiness Portal
SAP Business Network on BTP Product Documentation- SAP Business Network for Trading Partners
