Account Administration
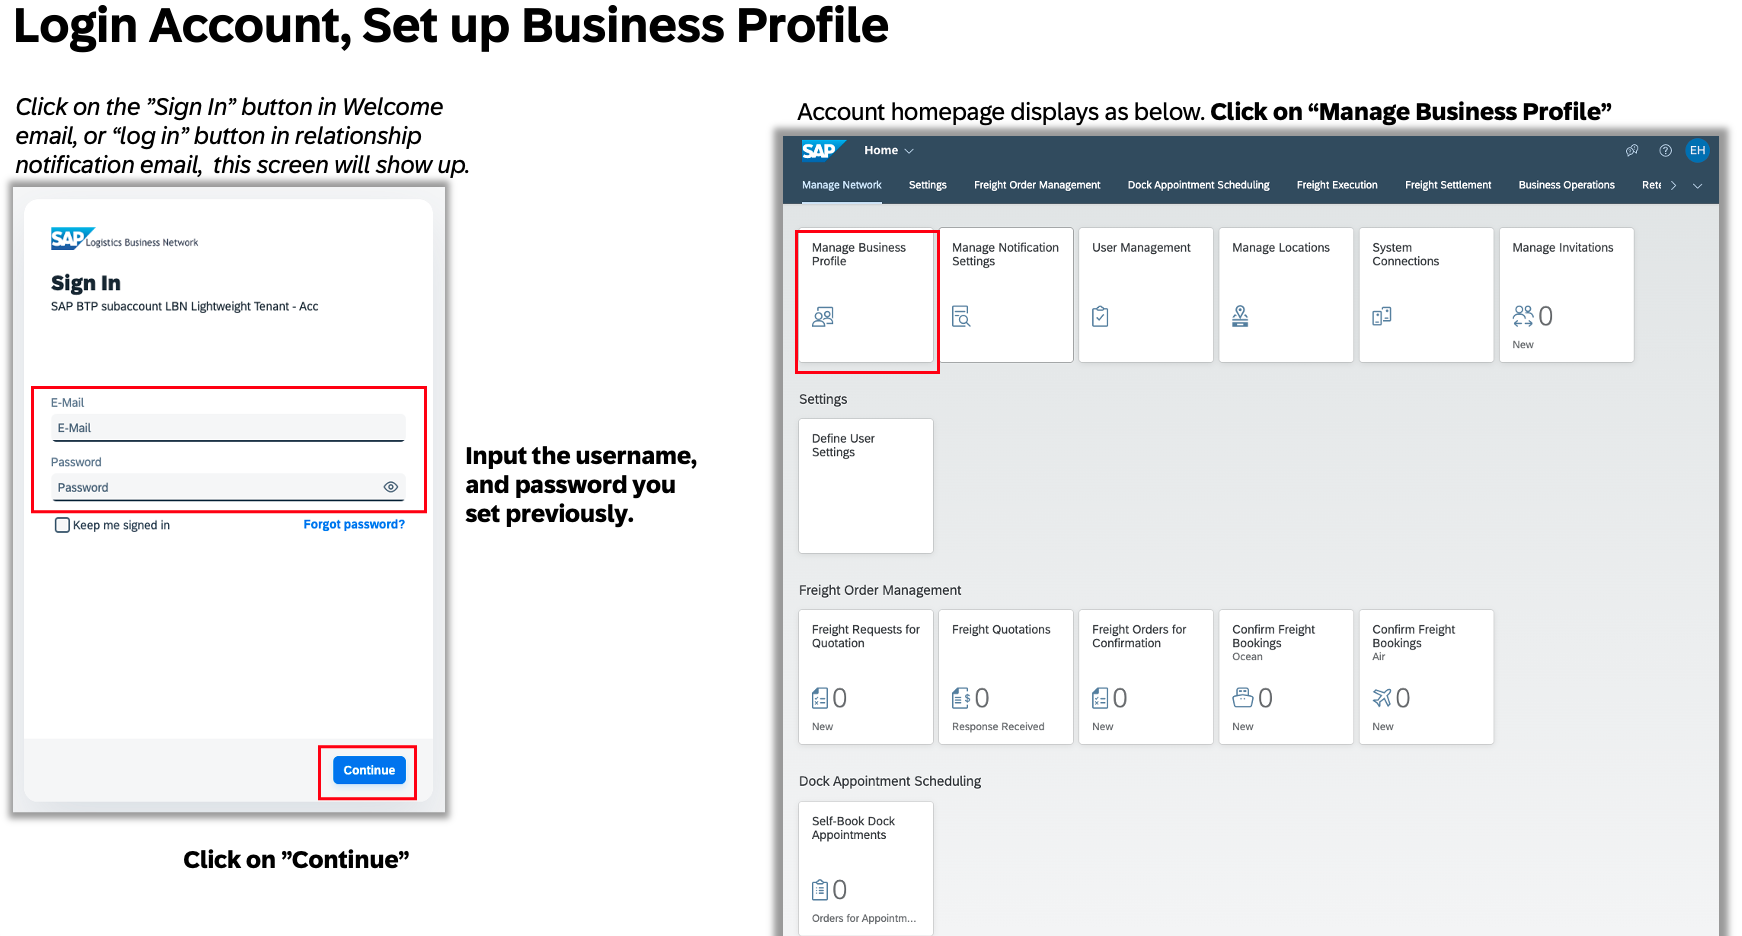
Login to Your Account
- Click the “Sign In” button in the Welcome Email or the relationship notification email.
- Enter the username and password you set during registration.
- Click “Continue” to access your account.
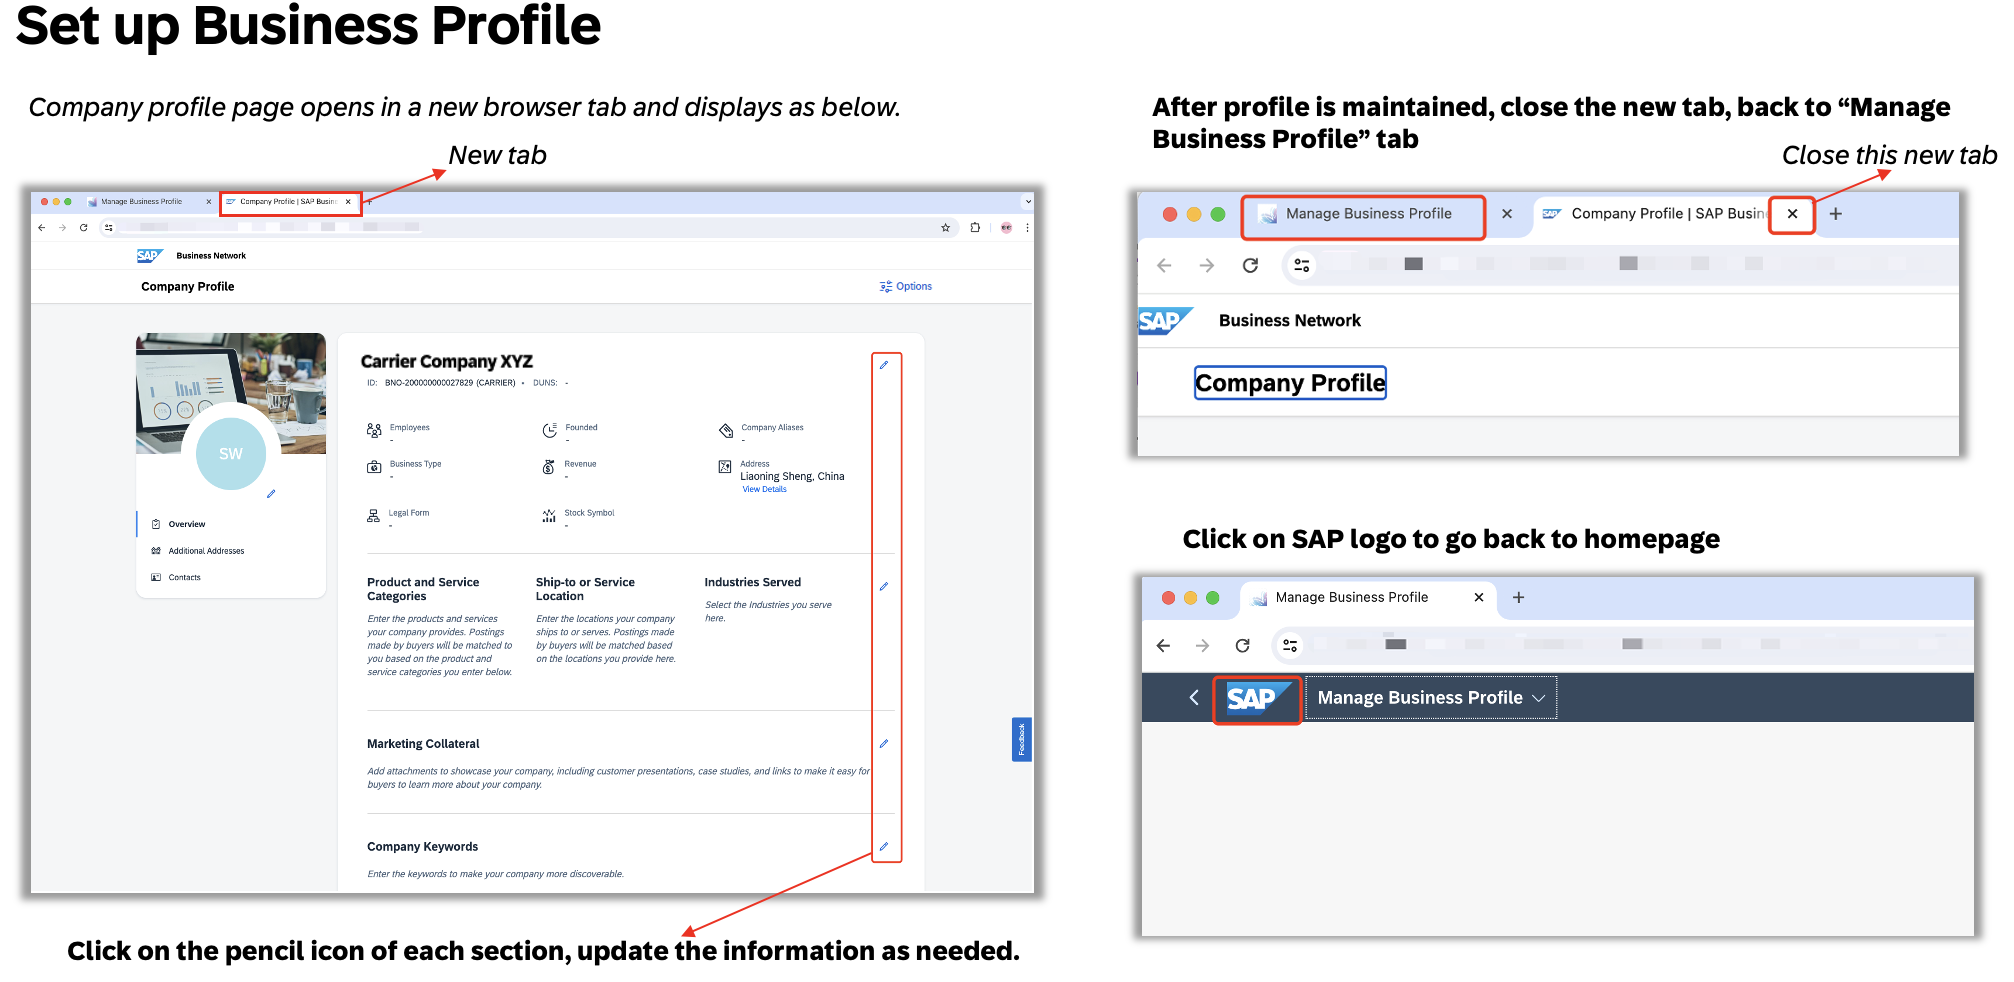
Set Up Your Business Profile
- Once logged in, click on “Manage Business Profile.”
- Update the necessary details in your business profile by clicking the pencil icon next to each section.
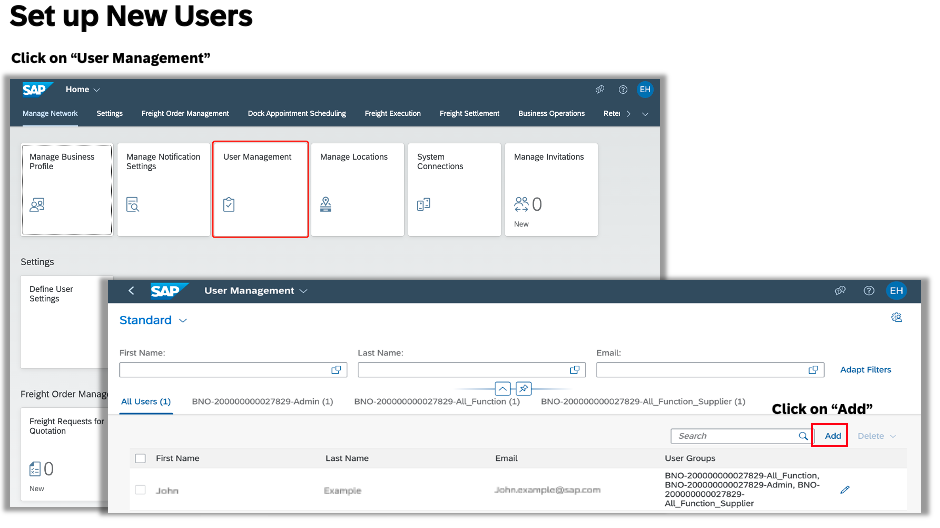
Add New Users (Optional)
- If you're an admin user, you can add other users to the account.
- Go to User Management, click “Add”, and enter the new user's name and email address.
- You can assign roles as it is described below:
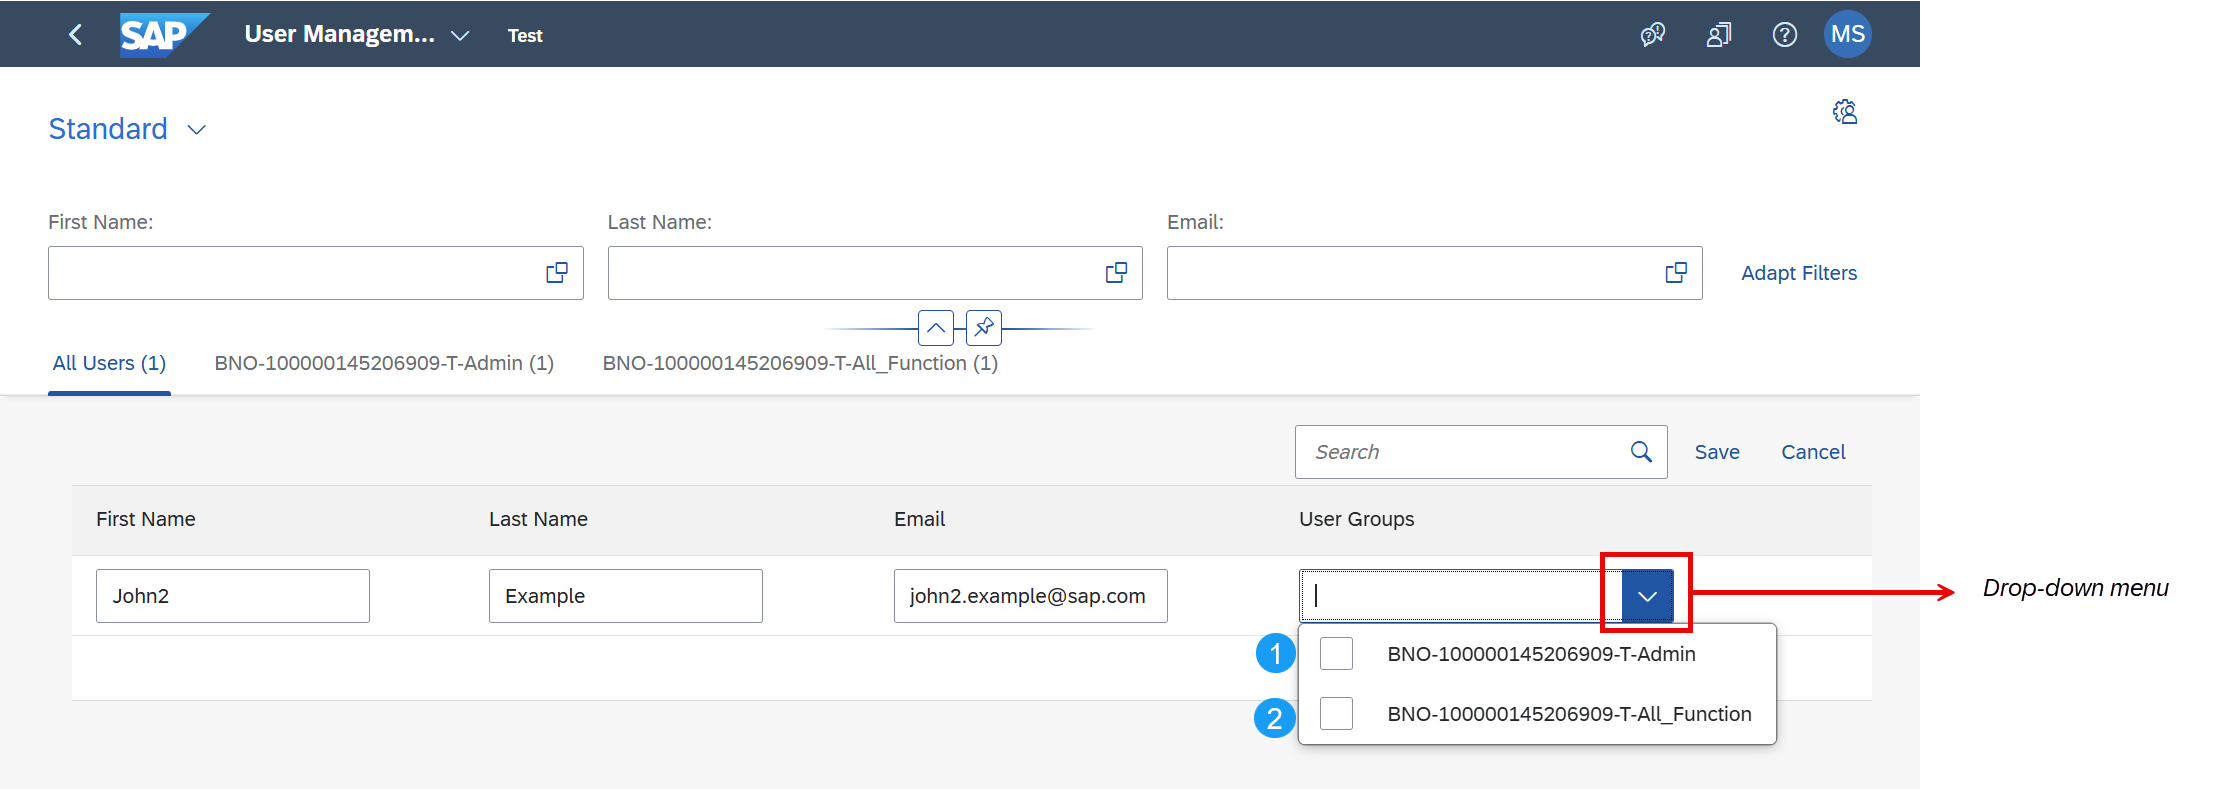
Admin: it allows user to logon and manage the account (including permission to create new users)
All_Function: it allows user to view and work on transportation orders (Freight Collaboration solution: RFQ, Freight Order, Dock Appointment Scheduling, Invoicing)
More information about User Groups can be found here.
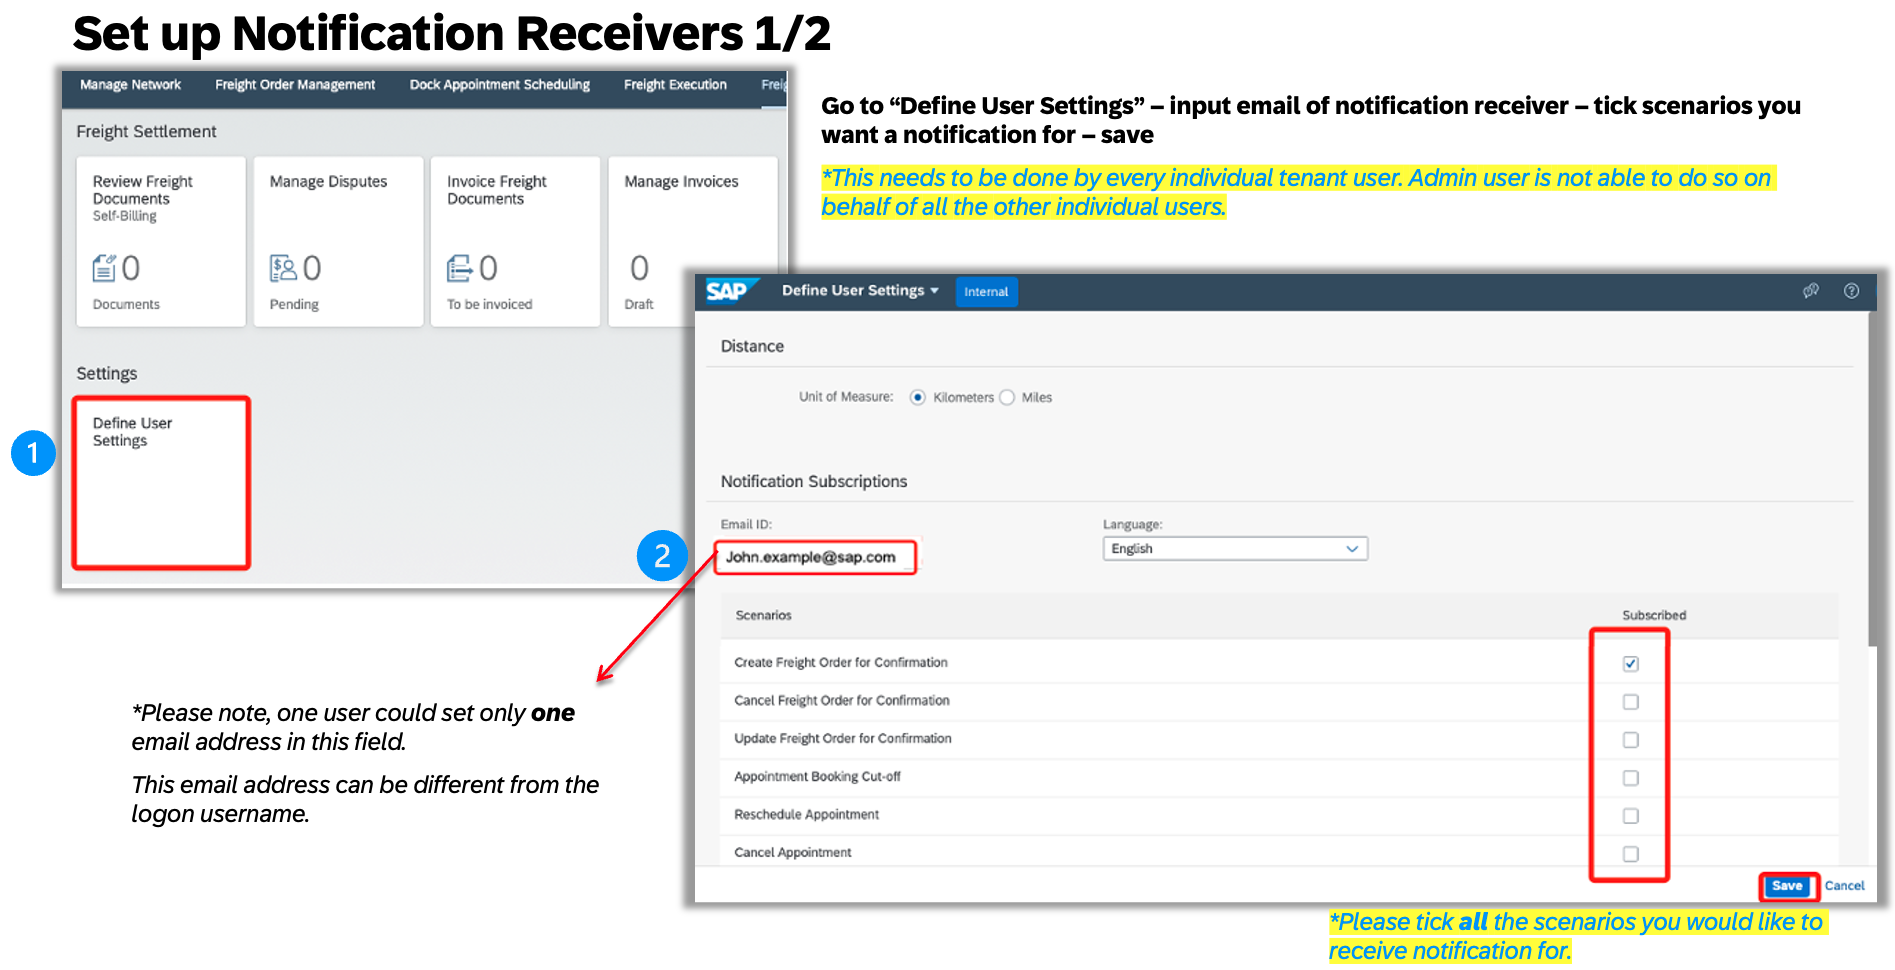
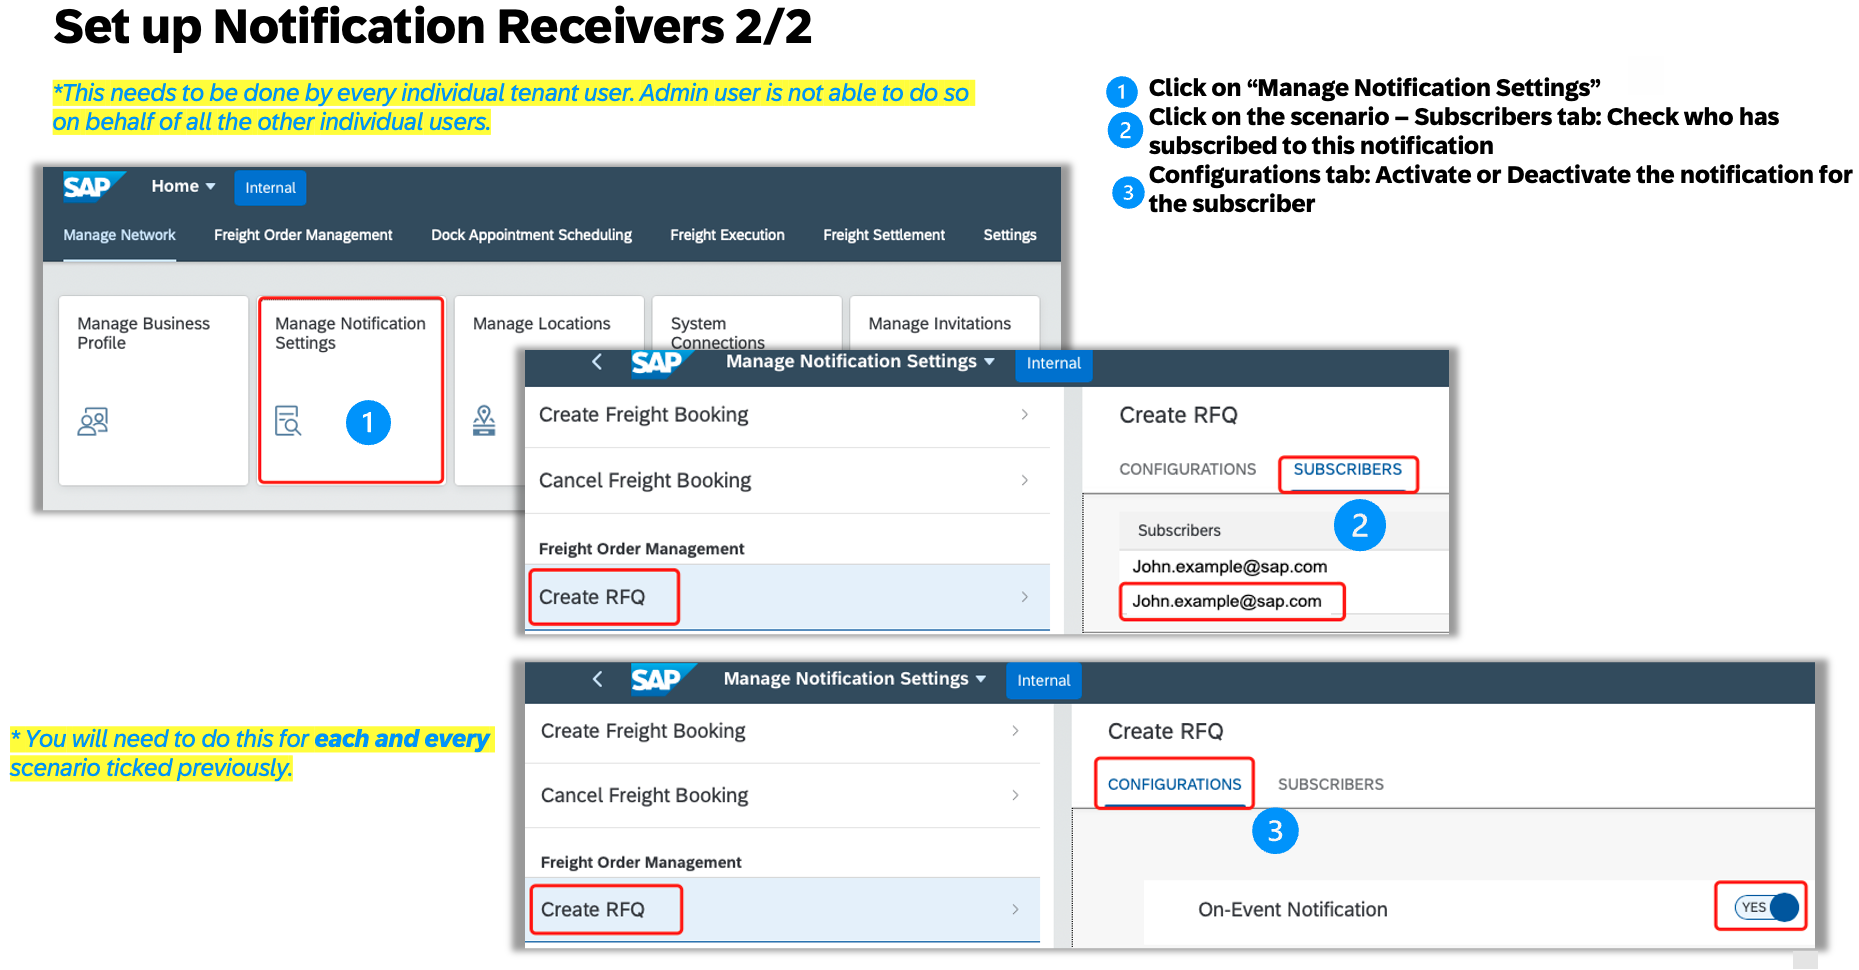
Set Up Notification Receivers (Optional)
- Go to Define User Settings and enter the email addresses of users who should receive notifications.
- Select the scenarios for which you want to receive notifications.
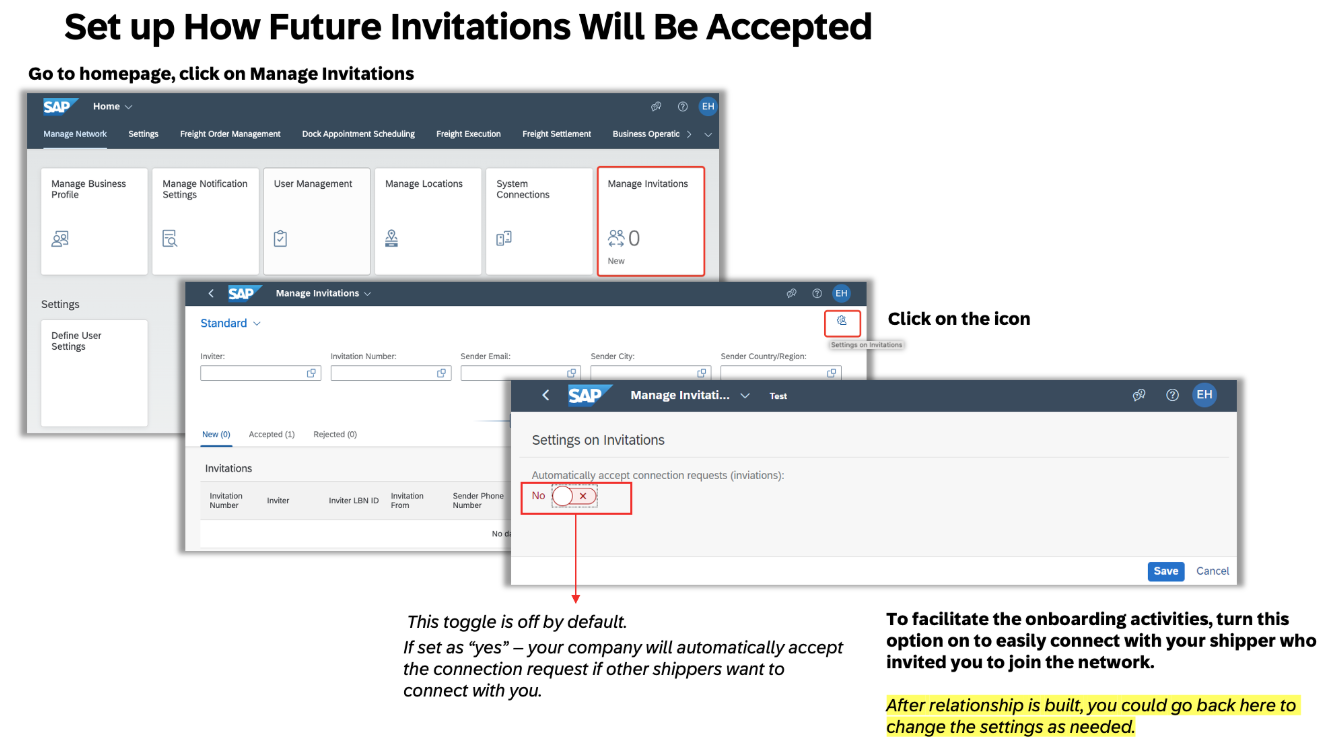
Set up How Future Invitations Will Be Accepted
- Turn this option on to connect with the shipper who invited you.
For further details on account administration please visit Administration Guide for Logistics Providers.
