 |
| ||||||||
Steps to configure certificate based authentication (WS-Security) for web services
Inbound to Ariba web service:
- Use a keystore along with a X.509 certificate encoded using Privacy Enhanced Mail (PEM) base64-encoding. If you do not have one from a valid Certificate Authority, you can generate a self-signed keystore/certificate by doing the following:
- Open your command prompt and change the directory to your machine's Java install bin directory
- Run the following command to generate a keystore (in Windows) - Replace password with an actual password you want to use:
keytool -genkey -keyalg RSA -alias selfsigned -keystore keystore.jks -storepass password -validity 360 -keysize 2048
-
- Step 1b created a keystore file named: keystore.jks. It is a Java keystore that contains my new certificate and the public and private keys.
- Now extract the PEM certificate from the keystore that can be implemented into the Ariba UI for the endpoint authentication. From the command prompt, run the following command (Replace password with the actual password set in step 1b):
keytool -exportcert -alias selfsigned -keypass password -keystore keystore.jks -storepass password -rfc -file keytool_crt.pem
- For the purpose of this solution, I will be referring to configuring the request in SoapUI. In Ariba, go to Manage > Administration/Core Administration > Integration Manager > End Point Configuration > New
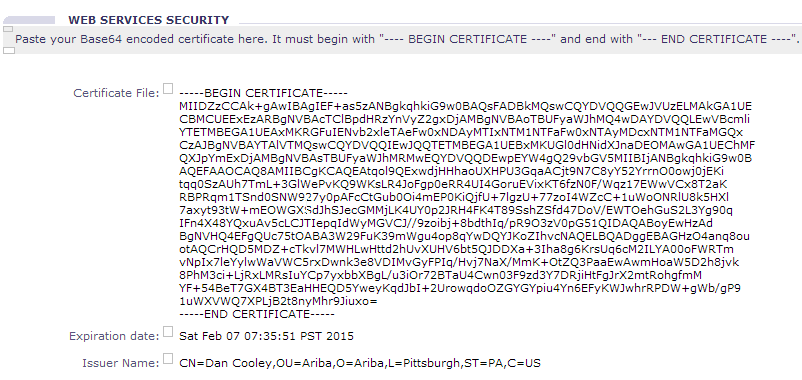
- Paste the X.509 certificate encoded using Privacy Enhanced Mail (PEM) base64-encoding extracted in step 1d, paste into the Certificate File and save the changes. The first line of the certificate must be the following text:
-----BEGIN CERTIFICATE-----
The last line of the certificate must be the following text:
-----END CERTIFICATE-----
- Go to Manage > Administration/Core Administration > Integration Manager > Integration Configuration > Choose the web service desired, edit it, ensure it is enabled and using the endpoint created in step 3.
- Copy the WSDL URL
- In SoapUI, create a new SoapUI project and use the WSDL URL copied from Ariba
- Double click on the project
![]()
- Click the Keystores tab and click the Add icon (looks like a + sign)
- Choose the keystore file created in step 1 (the .jks file extension) and enter the keystore password. Once this is done, the status of the keystore should be OK

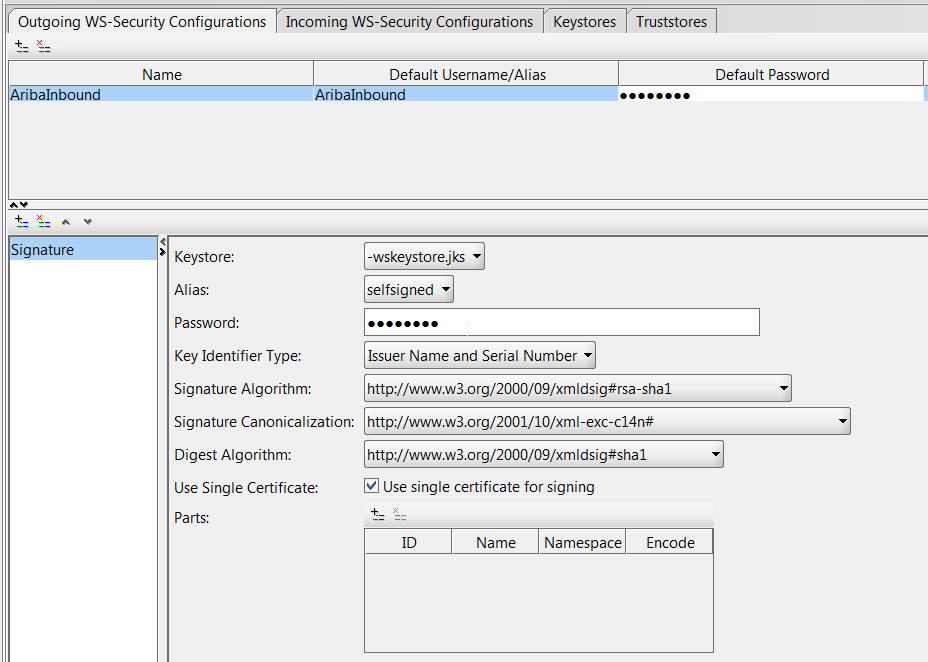
- Click the Outgoing WS-Security Configurations tab and click the Add icon (looks like a + sign)
- Click the Add icon in the lower pane to add the type of security. Choose "Signature"
- Choose your keystore and alias from the drop down and enter the keystore password. Make the Key Identifier Type = "Issuer Name and Serial Number". Once configured the configuration will look like:
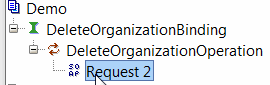
- Open the request in SoapUI by double clicking on it:
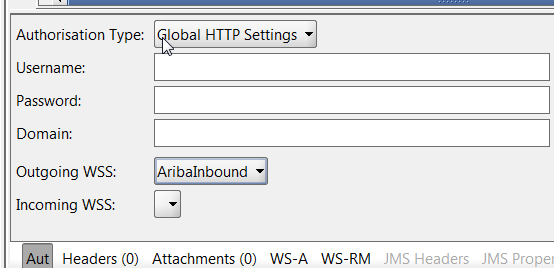
- In the request, click the "Aut" tab. Set the Outgoing WSS to the name of your "Outgoing WS-Security Configurations" created in steps 10-12.
- Now, you can run the request from SoapUI. You should see a successful response
Outbound from Ariba web service to middleware:
- Ensure step 1 has been completed from "Inbound to Ariba web service" steps
-
In Ariba, go to Manage > Administration/Core Administration > Integration Manager > End Point Configuration > New > select Type as "Outbound"
For "URL", specify the end point. This will be the location Ariba sends the SOAP request. Ariba recommends the use of https; however http will also work: - Set "Sign with Ariba Private Key" to be Yes and Save the end point
- Go to Manage > Administration/Core Administration > Integration Manager > Integration Configuration > Choose the web service desired, edit it, ensure it is enabled and using the endpoint created in step 2. Also, set the URL (should be same URL as endpoint URL, but could have additional parameters in the URL)
- Open the WSDL URL and copy the URL in the browser
- In SoapUI, create a new SoapUI project and use the WSDL URL copied from Ariba
- Ensure that create MockService is checked
- On the next screen, fill in the data regarding the port and path
- Double click on the project just created
- Click the Keystores tab and click the Add icon (looks like a + sign)
- Choose the keystore file created in step 1 of Inbound to Ariba web service (the .jks file extension) and enter the keystore password. Once this is done, the status of the keystore should be OK
- Click the Incoming WS-Security Configurations tab and click the Add icon (looks like a + sign)
- Give the entry a Name and choose the keystore value for "Decrypt Keystore" and "Signature Keystore" and enter the keystore password
- Click on the MockService within the Soap project
- Under MockService Properties, set "Incoming WSS" to the name of the configured "Incoming WS-Security Configurations" done in step 13
- Double click the Response and manually enter values to make the response meet your desired result (success or error). This is the response sent to Ariba when the request comes into SoapUI.
- Now, you can generate data in the Ariba application that uses the intended web service to send data to your SoapUI.
For more information on generating a keystore using the steps mentioned, see:
For more information on configuring WS-Security in SoapUI specifically, see:
http://www.soapui.org/SOAP-and-WSDL/applying-ws-security.html
 | Steps to configure certificate based authentication (WS-Security) for web services using SoapUI.txt | 6.75 KB |
Purchasing
Strategic Contracts
Strategic Sourcing
Supplier Information & Performance Management